Sentry (@hesed/sentry)#
The @hesed/sentry plugin lets you triage errors, list issues, and manage Sentry projects from the terminal. It is preinstalled with Sidekick.
Prerequisites#
- A Sentry account (cloud or self-hosted)
- A Sentry Auth Token (see below)
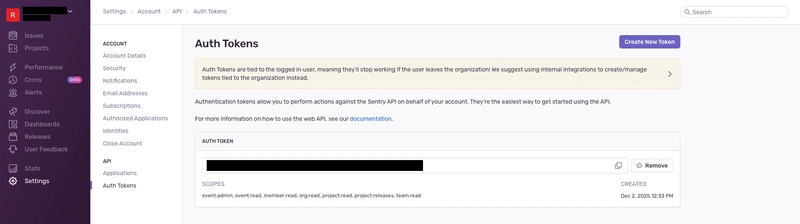
Step 1: Get your Sentry Auth Token#
- Log in to https://sentry.io or self-hosted URL
- Click your username or avatar in the bottom-left sidebar
- Select User Auth Tokens (or go to Settings → Account → API → Auth Tokens)
- Click Create New Token
- Give it a name (e.g.,
sdkck-cli) - Select the required scopes — at minimum:
project:readevent:readorg:read
- Click Create Token
- Copy the token immediately — it won't be shown again
Step 2: Configure auth in Sidekick#
sdkck sentry auth add
You will be prompted for:
- Host —
https://sentry.iofor Sentry cloud, or your self-hosted URL - Auth token — the token you copied in step 1
- Organization slug — your Sentry org slug (visible in your Sentry URL)
Step 3: Verify the connection#
sdkck sentry auth testExample commands#
# Get details about a specific issue
sdkck sentry issue get 123456789

# List projects in your organization
sdkck sentry project issues my-project --query "is:unresolved"
Discover all commands#
sdkck help sentryTroubleshooting#
401 Unauthorized / permission denied
- Re-check that the token scopes include
project:readandevent:read - Ensure the token has not been revoked
Organization not found
- Confirm the
--orgslug matches exactly what appears in your Sentry URL:sentry.io/organizations/<org-slug>/
Self-hosted Sentry
- Use your full self-hosted URL as the host (e.g.,
https://sentry.yourcompany.com)